Course Description
The course started quickly with learning what an Architect and Civil engineers actually do. Then we moved onto an architectural styles presentation, breaking down various styles architects have used and continue to use throughout history. The first physical project we created was a model shed. This gave the class an introduction into structural systems such as walls, roofs, and the building process. Once the physical construction of the model shed was completed, we began a walk-through of Revit by recreating the model shed with the software.
Architectural Styles Presentation
Model Shed


Revit Model Shed
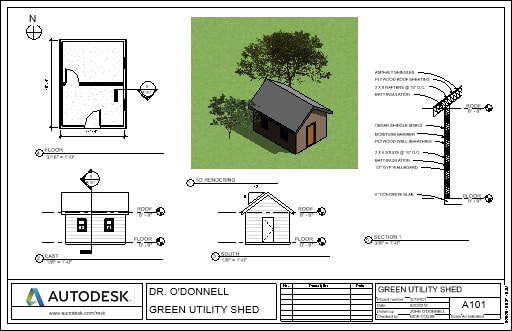
Project description: The Model shed was the first taste of Revit for the course. It was based on the Model shed we had built by hand in the previous project. We started with a basic floor plan and then added detail items like doors, window, and trees. The project was finished by placing the shed into a building site and including all elevations and a wall section. There wasn't much freedom in the project because every detail was specified and then demonstrated by Mr. Zeroth. This guidance was beneficial as it gave me a more thorough understanding for the next project in Revit.
Affordable Home Project
Project Overview: The class was tasked with creating a detailed home design for a client that incorporates Habitat for Humanity standards, Residential Building Code, and any requests made by the client. The project began by choosing a client and meeting with them. From this meeting I hoped to gain an understanding of the client's personal taste as well as their needs for home. While sitting with the client we created a bubble diagram to show everything that will be in the house and generally where it will be to better understand the flow of the home. Then a few initial sketches are done and given to the client for approval so they can see in detail how the home will be laid out. Once a sketch is approved, the house is then laid out on Revit for the first time. Once the floor plan is finished the roof, ceiling, and floors are added along with the foundation and footer. After the structural shell of the house is completed I looked to the inside and start adding doors, windows, and finished flooring. Also by adding lights, kitchen equipment, bathroom accessories and furniture, I was able to turn the structure into something that actually feels like a home when you look at it. Along this entire project I gave progress reports and received feedback from my client on what to change and what looks good. The Revit portion of the project was finished by placing the house in a site plan, which shows what the house will look like on the actual property. Throughout the entire design process the class was taught calculations that architects had to do to insure that their structures were sound. I had to use all of these calculations for the final presentation package. For this I simply printed off the elevations, site map, interior and exterior views, and included write ups and calculations for the home.
Client: Keith Downs, Principle of South Western High school
Client interview Process: Come prepared with background information about client needs, questions, sketches, and examples of architectural styles to choose from. I then scheduled a meeting with Mr. Downs to get enough information to create a first stage design of the basic floor plan. I recorded information and created a bubble sketch to make sure we are both on the same page.
Mr. Downs Home requests...
2 Adults, 3 kids ages 13, 11, 8, and 1 dog
No physical Disabilities or other special needs
Modern house style
Open Living space with privacy for bedrooms
4 bedrooms
2.5 bathrooms
Maximum Square footage: 1230ft^2 (Habitat for Humanity standards)
No extra storage
2 car garage
Big living room
Rain water collection system
Solar panels
Cut stone siding
Hard wood floors with carpeted bedrooms
Garage doors to the side of the home
Lots of windows for natural light
House facing SW
High ceilings
Covered back Patio
|
Bubble Diagram
|
Initial Sketch
|

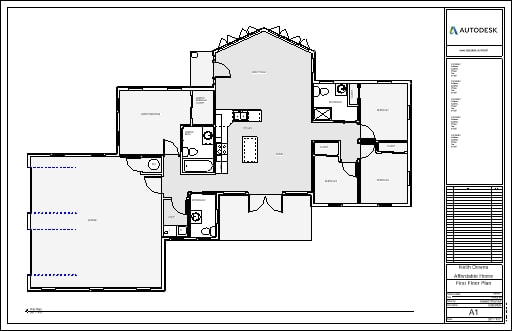
First Floor Plan
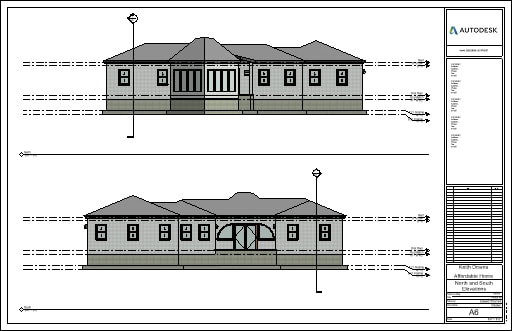
North and South Elevations
|

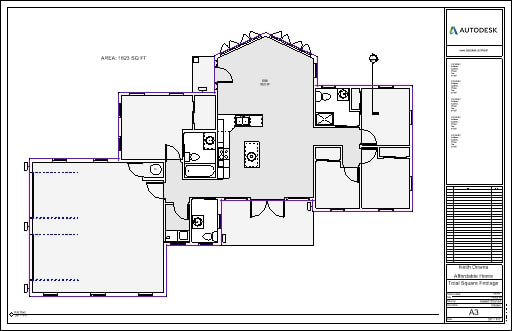
Total Square Footage Plan
East and West Elevations
|
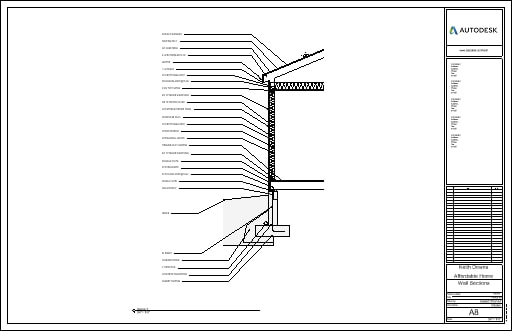
Wall Section
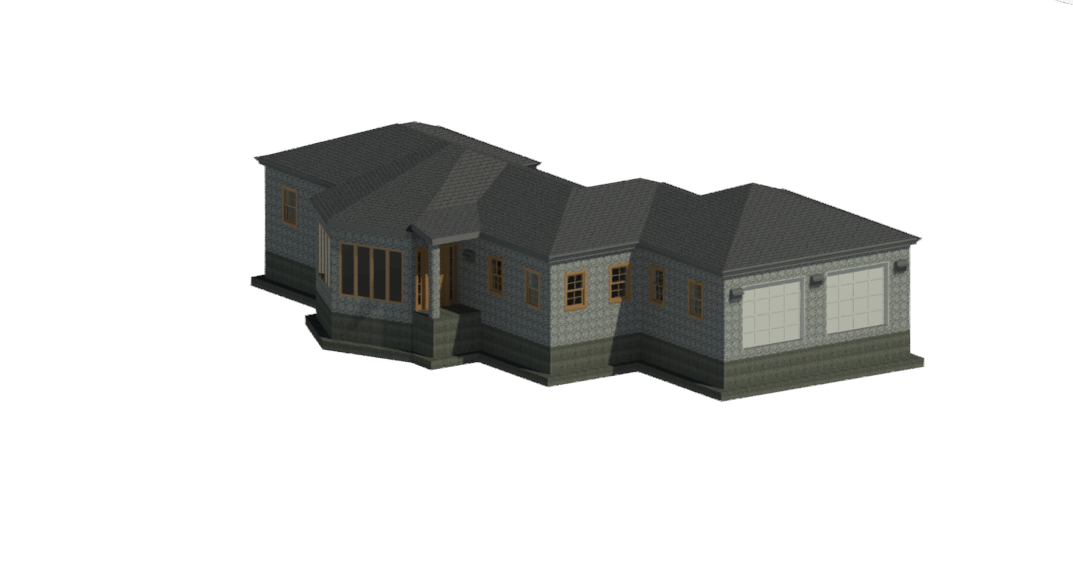
Ray Trace Front View
|

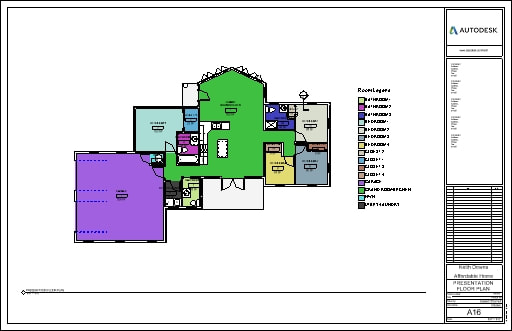
Presentation Floor Plan
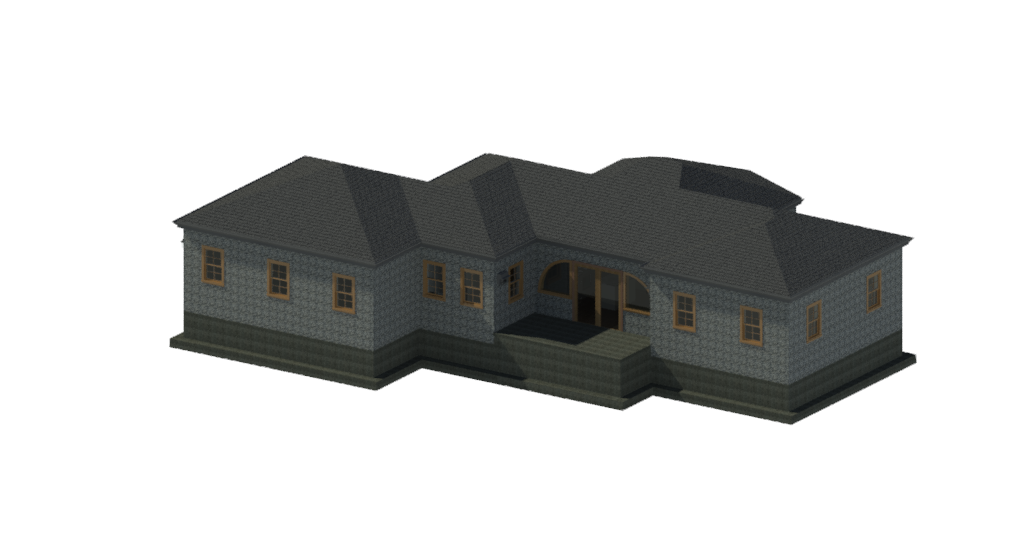
Ray Trace Rear View
|
Interior Photos


|
Site Plan
|
Structure on Site Map
|


Keystone Library Project
Project Overview: The class was tasked with taking an abandoned warehouse and converting it into a publlic library. We began the project by choosing a partner to work with throughout the entire project. Once we selected our partners we were given the brownfield warehouse on Revit and were set free from that point on to create our project. The project had very few restraints which are listed below, but the biggest freedom for this project was the felxibility of cost. The underlying theme for this project was "Money is no object" and this truly let us show our creative capacity for reusing the structure of the brownfield. Along side designing the structure we learned about things like beam analysis, International Building Codes, and more in depth calculations about roofing. Once the structure was completed we filled the library with furniture and detail items such as book shelves, computer stations, and restrooms. Then after the library itself was finished we placed it in the site map and had to create a parking lot that was appropriatly sized to the occupancy of the library. Once the Revit parts of the project were completed we moved onto calculations and setting up our presentation package. While there was no client for this project it was made more interesting because of having to work with a partner. My partner brought his own style and knowledge of Revit and we seemed to be able to capitalize on those strengths. It was ocasionally dificult delegating work between each of us but in the end we produced an amazing product and shared a great learning experience.
|
First Floor Plan
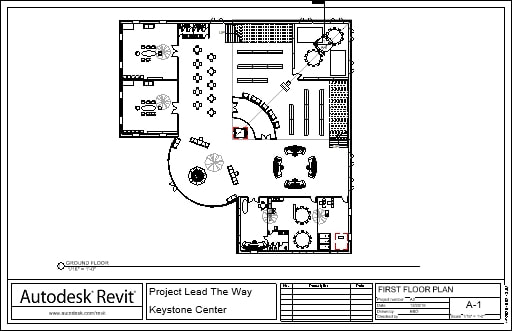
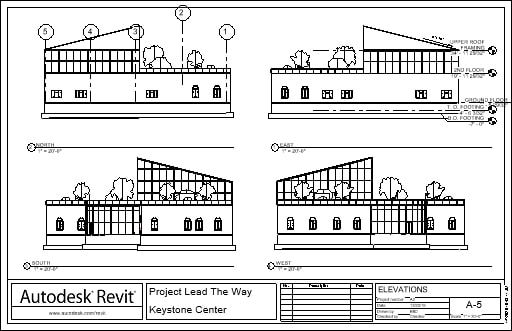
Elevations
|
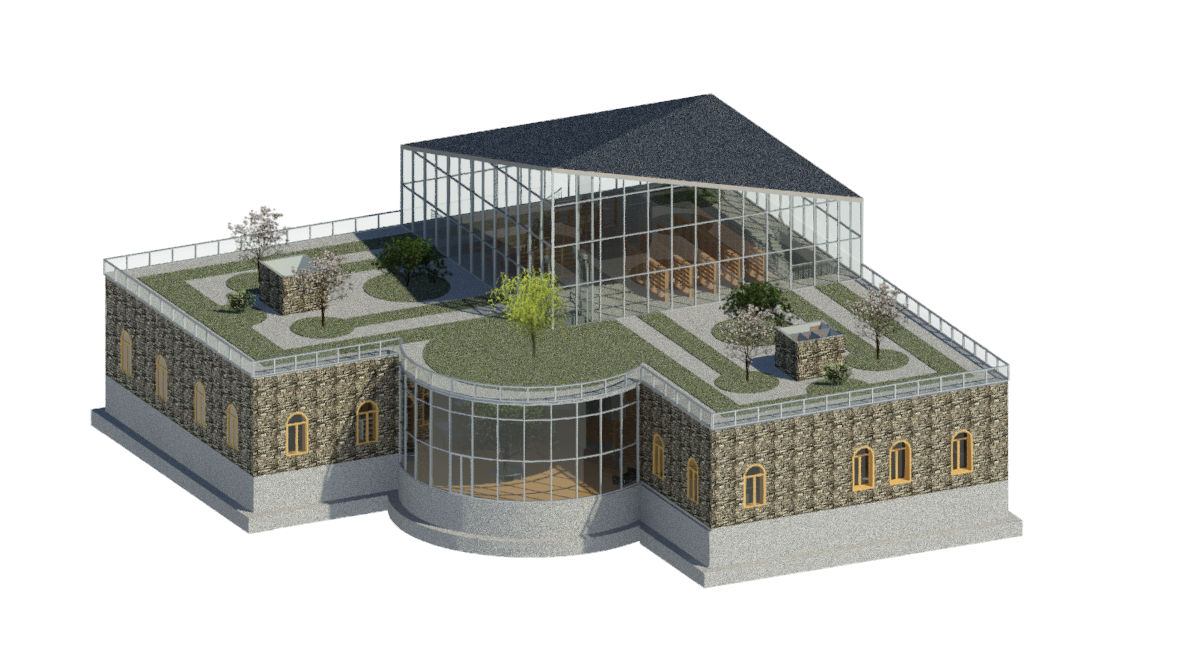
Second Floor/Roof-top Garden

Ray Trace View
|
Rendered Images


